Sunday, January 31, 2010

Out of Steam

Sunday 01.31.10
An update on the weekend list.

1.  sand and patch paint where tape pulled off finish

Done.  But it always seems there is one more touch up to do.  I think I'll be taking a tiny brush out for touchups after everything is all totally back together.

2.  cut baseboard and base of vanity cabinet to allow for flush position to wall and plumbing access.

Done.  But oh, what a production.  It's all about having the right tools and the right approach.  We thought our little dremel (advertised as the end all-be all tool) would cut through the baseboard, but alas, the baseboard was thicker than the blade could cut.  So after exhausting our in-house tool supplies, Kip ran to the Depot for some chisel tools.  He then painstakingly chiseled the cut to be a clean cut on the baseboard and then worked to jimmie the rest of the board loose.  It didn't help there was a sad lack of structure behind the baseboard as every time the hammer claw, or chisel was wedged behind the board, there was no resistance and the tool was useless.  Eventually though, Kip prevailed.  He then drilled two neat holes in the base of the vanity to allow for the hot/cold faucet connections.  I had protested that it would be impossible to perfectly drill the holes and that we should just notch out the area, but Kip insisted and he did it so well, it slipped right over the pipes. 


Beautiful job.

3.  plumbing for sink

Not done.  Let's just say, four trips to the Depot in one day (Saturday) and we are still not done.  Although we're close now.  When you take out one sink and replace it with another, stuff just doesn't fit back together.  Let's just leave it at that and leave all the other four-letter words back in the bathroom where they belong.

4.  add quarter round at joint of baseboard and floor

Done.  Kip measured and cut the miters and actually allowed me the hammer and nails to put the trim in place.  I have to admit, as with everything else, it is easier to stand back and advise how to do it better, than to actually do it, and Kip was a good man and didn't take the bait.  He stayed out of the way, let me swear my way through it, complaining all the while that we didn't have a nail gun, and I managed to get it in place and NOT smash any fingers in the process.

And here....because of #3...is where we've run out of steam...

5.  plumbing for toilet

Waiting on sink finishing.  because you can't be plumbing under the cabinet when you can't fit your  ass into the room.  Hopefully though, this plumbing will be an easier re-assembly.

6.  add new toilet seat and flush handle

I did add the new toilet seat after Kip kindly helped by hacksawing off the old one.  You never realize how the bolts disintegrate until you try to unfasten things.  Do you think the local Freecycle folks would be interested in an oak toilet seat?  I hesitate as there's something distasteful about offering a used toilet seat...

7.  pray nothing leaks

Postponed for the hookup party.

8.  add frosted film to window for privacy

Will wait until other plumbing is done to maintain the maximum of light.

9.  hang mirror

Comes after the sink and toilet are done.  But we did pull it out of the box and hold it in place - gorgeous!  And I may actually have room below the mirror and above the faucet for a small glass shelf.

10.  measure, trim, stain and install end moulding in doorway

Considering waiting for this until the flooring (intend to carpet) in adjacent room is done.

11.  consider accessories and artwork and place
 
We know one piece of art that is definitely going in, but again, must wait until everything is in place.
 
 
So what did we do today?
 
After a bit of a rough Saturday, we gave each other permission to stop....to breathe...and to not finish. I so wanted to be done with the first face-lift project by the end of January, but we've been going non-stop and I needed to remind myself that one of the things I said at the beginning:  I hope to maintain my sanity and my happy marriage.  So today, while a little work was done, it was only what we felt like doing. 
 
Laundry was finished. 


A gallery image system was hung in Kip's studio.  (Isn't his work gorgeous?)


The quarter round trim was nailed in place.  (pay no attention to the corners, I still have to work the wood putty magic) 
 
 
The wood switchplate was painted, cut to fit, and installed. 
 
 
An apple cake was baked.   (Kiki - this is for you!)
 
 
A pot of chili is bubbling on the stove. 
 
 
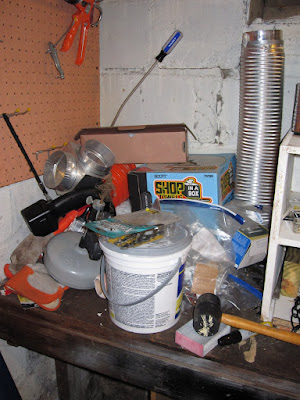
And it's okay that the toilet is still sitting next to my desk and the water in the bathroom is still turned off. 
 
 
For today, it's enough.

Friday, January 29, 2010

Adding Features...

Friday 01.29.10
I've started to build out the site a bit more, so if you are bored, go check out my About page, and my Crazies Like Me page....and stay tuned for the Cashbox and Toolbox pages coming soon.

I can only do so much people.

I AM.....

Friday 01.29.10
Last night, as I spent a lovely night out with friends and colleagues, I was sipping my cosmo and enjoying a yummy crab and potato croquette, when my blackberry buzzed.

From: Kip
Subject: I AM....

Message:  A 12x12 adhesive tile GOD!


I have to agree.

Weekend list:
  1. sand and patch paint where tape pulled off finish
  2. cut baseboard and base of vanity cabinet to allow for flush position to wall and plumbing access.
  3. plumbing for sink
  4. add quarter round at joint of baseboard and floor
  5. plumbing for toilet
  6. add new toilet seat and flush handle
  7. pray nothing leaks
  8. add frosted film to window for privacy
  9. hang mirror
  10. measure, trim, stain and install end moulding in doorway
  11. consider accessories and artwork and place
Done??? We'll see.

Wednesday, January 27, 2010

The Advantage of Incompetence

Wednesday 01.27.10
So last night I attempted my first ever peel and stick flooring.  They make it look SOOOOO easy on TV.  Have I mentioned lately how much I love/hate HGTV?  I believe that the length of time since I took a geometry class is the fatal flaw.  I'm having a real difficulty understanding negative space, area measurements, and probably the pythagorean theory.  Luckily, the tiles only cost about $0.88 per square, because I killed the first four I tried to measure and cut to fit. 

Remember how I said we were going to break all the rules on the directions provided?  We thought we were being brilliant in not starting at the center of the room as they suggested.  You see, I measured to the center and then began dry-fitting it all and realized I was going to have to make a ton of minute (less than 3 inch strip) cuts all around the borders since the room is only about 4.5' x 4.5'.  Instead, we determined to start at the doorway and move back to the back wall and make all the cuts fall behind/under the toilet and sink vanity.  Brilliant right?  Well yes, but...no.  The reason they want you to start from the middle with full tiles is so the bulk of the floor is done BEFORE you start making any cuts.  But since we wanted to start from the doorjamb, the first row was going to require some cutting to get it in.  The door jamb opening would be full size tiles, but the adjacent tiles would require some cutting to accommodate the kick moulding.  (Make sense?  I know it is a visual thing, and I was too pissed off last night to take pictures and too lazy today.)  Trust me though....I just wasn't up to the task.

When Kip arrived home expecting the floor to be mostly complete and found me hiding under a blanket, watching TV and answering questions with grunts or monosyllabic words at best, he deduced we had an issue.  To my credit, it is the first time in this process I've shown distress or temper.  On the other hand, it's only the first project and only about 3 weeks into this year-long program, so it could be a long and bumpy ride.

So, what, you say, is the advantage to my demonstrated incompetence in measuring and cutting tiles?  While I'm working a little late at the office tonight, Kip is working on the floor.  I struggled with letting it go this way, because you see, this is supposed to be my project and if you know me, you know, while I'm a generous person, still....it's all about me.  ;-)  In this case, that means I want to be the one accomplishing the tasks and reaping the benefits.  I want to stand in this room when it is done (or sit as the function of the room is primarily about that) and say, "Damn girl....nice job."

But sometimes, you just have to say Uncle.  And let it go.

I'm headed home now, and we'll see how my much more competent and loving husband has done on my night off.

Tuesday, January 26, 2010

In the Planning Stage - the Home Office (aka 3rd Bedroom)

Tuesday 01.26.10
On the first floor of our house - off the dining room, through a glass panel door - we have what the realtor calls a 3rd bedroom.  It comes complete with a cedar closet and it is totally ironic that this room - the one we DON'T use as a bedroom has the largest closet in the house.  Don't you just love old houses?

Anyway, since it is on the first floor and off the dining room, we made it our home office.  It is packed full with two desks, two computers, two filing cabinets, a printer stand, a bookcase, and an antique school desk.  The closet is a mishmash of supplies from wrapping paper and boxes to guitars (Kip has about 5-6 at any given time), computer parts and supplies, and various miscellany.  It has a hardwood floor that has never been refinished and badly needs it.  And it is located over the garage so the floor is always quite cold in the winter.

Since the bathroom we've been working on is right off this room, everytime I walk through with a paintbrush I look at this room and think, "This room has to be next on the list." 

So we brainstormed some things last night.

  1. First is always CLEAN CLEAN PURGE PURGE AND CLEAN SOME MORE.
  2. Paint the room the Thunderstorm color which is now on the chair-rail in the bathroom.
  3. Remove old moulding and replace with crown moulding to match the dining room - paint it linen white gloss along with all the trim in the room.
  4. Pick out a beautiful carpet to install wall to wall (by professionals) in a muted gray-sage color with some padding that helps to insulate the cold floor.
  5. Replace the tall narrow bookcase (which will go up on local Freecycle most likely) with a low wide 2 shelf bookcase.
  6. Hang guitars on hooks I gave Kip last year (to try and accept that we have 5-6 guitars and get them out of the closet) on the wall above the shorter wider bookcase.  Hang other original artwork of his around the room in groupings and add some vertical storage with shelving.
  7. Move or sell/freecycle the antique school desk.  (I love this piece, but it takes up so much floorspace that we just don't have!)
  8. Replace the falling apart file cabinets (either new metal cabinets to go into the closet, or a wide wooden version to add surface space to office area)
  9. Get parson chair fabric covers for the current tapestry chairs cat has used as a climbing/scratching post
  10. Look for new closet doors (saw some great ones on HGTV that looked like Shoji screens -found them online at Home Depot, but they are nearly $400!!)
  11. Finally, finally, finally get real window treatments.  Currently have a greasy dusty mini-blind on one and a misfitted roller shade on the other.
That's the essence of the plan....it boggles the mind on how to get it done, but just think how we'll love the space when it is complete.

I'll upload some before shots soon to give an idea of our starting point.  Then I need to seriously think about budget....do the closet doors fit the bill?

Sunday, January 24, 2010

...small victories and tiny defeats...and a sneak peak

My ambitions to continue painting on Saturday ensuring Sunday would be for reassembling the room was proven unrealistic.  After a very long work week, a night of disturbed sleep, a long day at class, I came home feeling like I was in a state of jetlag.   I actually did consider it.  I stood in the unfinished, unlit room knowing what delaying the painting would mean for Sunday, but I just couldn't do it.  And truly, I shouldn't do it, because I knew it would result in a dropped paint tray, a major mistake, or something similarly disastrous that my patience would not be able to handle.

So instead, I laid down on the couch and promptly fell into a deep druglike sleep. 

So here we are at Sunday and after a half day of school I came home and got back to business, bathroom facelift business, that is.  Today I put the 2nd coat on the walls and the beadboard.  After accidentally painting two stripes of the wall color onto the beadboard (my excuse - low light in the room today) I quickly adjusted, wiped down the panels and started again.  If this is the kind of mistake I could make in daylight after a full night's sleep, I can only imagine what I might have done last night.  And I can now officially say I am THRILLED with the paint colors we chose...THRILLED I say.  I was less than thrilled when pulling the painter's tape off took some of the base coats, but it is nothing a little patchwork can't correct.

Working in low light has been a challenge in that room (as evidenced by my painting error this afternoon), but with the painting completed we could replace the light fixture.  Also, Kip had finished his shopping and cutting the mitered corners on the chair rail.  Today, adding that railing was the tipping point.  So while we didn't get as far as I had hoped, we got far enough to see the finish line. 

In our next work session we'll finish the flooring.  We started dry fitting some tiles tonight.  The tiles must be at room temperature for 24 hours before installing and we had them in a very cold garage.  We're going to ignore some of the other installation directions (I'll explain later) but after a long weekend of school and painting, I was ok with sitting down and doing a little blogging instead of risking having the tiles come unstuck due to temperature issues.

But just to keep you up to date, here are some sneak peak photos.


We were so excited to see the results coming together we started planning our next project. 

We must be certifiably insane.

Friday, January 22, 2010

Bit by Bit

Today I was able to be at home (since I put in about 50 hours already this week) and I took advantage of the found time.  I finally put some color on the walls and the room is looking less like a colorless cube and more like a developing space. 

Have you noticed how the paint chips never quite give you the feeling of how the actual color will work.  I don't mean to infer that the color is different.  It is actually a perfect match to the chip.  But the feeling can't really be accurate until you stand in the room with the walls painted and surrounding you.  Even then, so many elements are missing.  The furniture...or in this case, the "facilities"are not in place, the accessories, the window treatment, everything that builds to make the space a home.

So as I was saying, the colors are not necessarily what I expected, but luckily I love them.  I think the space will become what I hoped.  Progress remains slow, but we are getting there bit by bit.  There are just so many hours in the day.

Much of tomorrow is lost due to my class schedule, but Kip will help out with a shopping run.  With the colors on the wall we were able to choose between our two flooring options so Kip will pick up the tiles (peel & stick, but still tiles), also the sink cabinet we selected and the mirror.  With any luck, Sunday afternoon after school we can add the trim, do the floor, and maybe move the toilet and sink into place.  Kip has warned me not to get too ambitious about our day as he anticipates some plumbing complications could arise...so like I said, bit by bit.

If it takes this long to do a bathroom while we balance our other obligations, I can't imagine how long the bedroom might take...

Post Script:  Hurrah!!!  HGTV back on Cablevision.  It was running all day today and I was thrilled to see so many before and afters, envious of the in-house carpenter/handyman assistance, and ticked at their seeming ability to finish major home improvement projects in time elapsed weekends.

Wednesday, January 20, 2010

It's FREEcycle Time!!!

In April 1997 (I know because the receipt was still in the box) I came across this adorable sugar and cream pitcher by Mikasa. The pattern is Wine & Roses. Original retail $57.50 - purchased at outlet for $19.99. I was sure it would be the start of a whole collection.


Never happened. (What else is new?)

So, are you a "wine & roses" type?


According to a website I found that sells replacement pieces for this set, this is now a $30.00+ value (each sold separately)...and it is yours for $0 (unless shipping is more than $5).

It's yours, just put your comment in.

As always, first come, first serve.

Sunday, January 17, 2010

Update on Freecycle Napkin Rings

Jenn at Juggling Life - one of my all-time favorite blogs - has graciously offered my crystal napkin rings a new home. Since Jenn actually cooks for her family and entertains (it's true - I've seen the picture proof on her blog), they might actually see the light of day.

Jenn - they are on their way. When you receive them, I hope you'll put up a post of a beautiful place setting to complete their journey from dust-laden storage to part of your happy home.

Progress? Yes...but oh the waiting

So the bathroom is making me crazy progress.

There are a limited number of hours in every day, and most of my hours seem to be spent waiting for paint to dry. There is a reason people say, "It's like watching paint dry." It is not a rewarding way to spend time.

It is important to me to do this right...and as proved by my continuous refusals of help from Kip - to do it myself. As much as possible. This week he took on the spackling/sanding job and yesterday the not insignificant role of removing the toilet and the sink from the room. I never could have done that without him. As he was hefting the toilet out and moving it across the room, to sit in a lovely position immediately to my left he grunted out, "Make sure you give me credit on your blog...write about me like the father in (no caps) a christmas story." My mind immediately went to the father in (title caps) A Christmas Story - shouting out obscenities as he worked on the furnace, yelling at the neighbor's dog, and shrieking "Frageeelayy - it must be Italian." Yeah, it was kind of like that. But truly, he was a monumentous help.

Today, it was all about talking one another off the ledge. We both awoke with a case of the "Sundays" - essentially dreading the week ahead of us, feeling a need to accomplish something, while simultaneously yearning to just kick back and watch tv and eat popcorn all day. I have schoolwork waiting, paint drying, an incredibly busy work week ahead, and a toilet sitting next to my desk. Sigh.

As I reminded Kip that without a lot of progress being made today (and by that I mean returning the bathroom to working order, it would mean our housekeeper would arrive on Thursday to a disaster zone. Kip's response, "This is what a house under construction will be like this year." Reading between the lines I hear, "Your project, remember??"

So, what's next? Well the last coat of primer on the beadboard is drying. After three coats it still has a slighly orange (wood) cast, but I believe two coats of the linen white paint will cover it. The ceiling paint is on and drying - and I'm a little ticked that the manufacturer's label of flat white was wrong as it is actually glossy white. And no - there truly is no returning it as it has been in the basement for years.

Because the ceiling paint won't truly be set until an overnight drying, I can't tape it off to paint the walls. I mean, I could, but I've had experience with pulling paint off with the tape and you never quite get the patchwork right. So, after grumbling for a bit as the realization hit that there will be no big reveal of a new room this weekend I determined my to-do list. Dig out the semi-gloss trim paint and do the window sill and trim. Get the sawhorses up and lay out the moulding and sand, prime and paint that in the basement. Paint the door and the baseboard if the primer dries enough. Then, schoolwork! and maybe some popcorn.

So, I'm off to make some more progress...and will try to measure (and take credit for the accomplishment of) how many steps it actually takes to get this little 5x5 room done properly. Home shows be damned...I don't believe anymore you can do over a room in a weekend and have it done well.

Friday, January 15, 2010

Self-Checkout? Self-Help? Self-Nothing.

Ok, let me pause from my project reporting for a moment to discuss the disaster that is self-checkout at home improvement box stores.


I'm actually a fan of this option for quick checkout at the grocery store. I don't delude myself into thinking that I actually get out of the store any quicker than if I went through the express lane, but action always feels better than inaction. Just ask anyone stuck in traffic. Would they rather be driving 100 miles at 50 miles per hour (2 hours), or driving 10 miles at 10 miles per hour (1 hour). They'll take the 2 hour drive the majority of the time.

But when you combine large, bulky, materials such as construction equipment, etc. and then you don't even bother to offer up the option of a manned check-out lane...well...it's just WRONG.

In the last 2 weeks I've been to these box stores a number of times and have yet to get out without using the Self Checkout helper at least 3-4 times for each checkout. I mean, if they have to come help you several times is it really Self-Checkout?? Also, what is WITH the bagging area? My local grocery store has a bagging area several times the size and I'm checking out like - milk, meat, ziploc bags. At the Home Depot and Lowe's I'm checking out LUMBER, CABINETS, PAINT CANS....hello? big items here - can I get a little damn room?????

Deep breath....deeeeeeeep breath....

Just needed to get that out of my system.

Back to spackling (thanks to hubby), then moving on to disconnecting toilet and sink and moving them out to leave room for priming, painting, flooring, moulding....woo hooo!

Wednesday, January 13, 2010

It's FREEcycle Time!!!

Napkin rings anyone?


When I was registering for my wedding I was positive I would have occasion for some really elegant napkin rings. I registered for a set of 8 crystal rings by Kreisel.


Twenty years later...never been out of the box.


Come, on, you know you want them. First come, first serve.

Tuesday, January 12, 2010

Check Out Another Crazy Person Like Me

I spoke in a previous post of "Lay" - a fellow blogger she was the taker of my first freecycle. She and her husband have just purchased their first home. (Round of applause) and they've taken on a gutsy project. A home with a fire and a story like to break your heart. This place needs some serious hard work and tender care to bring it back.


Is it any wonder that she has started a new blog specifically about this and titled it, "Out of the Ashes." She's only a few posts in (like me) and already I've learned about some new places to shop not too far away that can offer some creative options and bargains.

So go check her out!

Monday, January 11, 2010

$146.07 - Bathroom Remodel Begins

Tonight Kip and I hit Lowes.

And can I just say - I never quite got that Lowes-T advertising campaign? I finally asked, "What is this Lowes - T campaign about..." Kip wisely suppressed his regular shit-eating grin and said, "Um...I think they are trying to say lowest?" Ok, so I'm not always the sharpest tool in the shed.

For the first time ever I think, I was totally prepared with a vision, a quest, a vision-quest of types. I had a list, I had measurements of nearly everything we might need, I had concepts and coordination. I was a design star.

I was SURE I wanted a pedestal sink, like this.


Which was perfectly respectable....but then we saw this...and we both went, "hmmmm".


And then we began looking at accessories...fun.


And check out this cool mirror.


We progressed around the floor to lighting, flooring, moulding/trim, paints, toilet seats...and while we did the room started to come together. Tonight was the little things - the light ($12.98), the faucet ($89.00), the toilet seat ($19.98 - goodbye oak wood!), and 3 different floor tile samples ($2.88). Later this week, we'll return for the sink cabinet, the accessories, the paint, the moulding. And the remodel truly begins.

Close your eyes and imagine colors called Crisp Linen, Roasted Garlic, and Thunderstorm with travertine floor (ok it's peel and stick, but still), some brushed nickel accessories and lighting, 4" moulding chair rail, and cherry cabinet with farmhouse style sink.

You're drooling right?

Keep your fingers crossed that it looks as good in reality as it does in my busy little brain.

Sunday, January 10, 2010

Next Time, I'm Painting Over It

Ok - so the wallpaper removal project is about halfway over. I'm taking a break, nursing some blisters and sore muscles, and letting the next layer of solution soak into the walls.

Here are few tips now that I'm no longer a wallpaper-removal virgin...I've reached rookie status.

Homemade is always better. Although you could go and buy a commercial chemical product, I decided to go greener, cheaper, and less smelly with a homemade remedy: downey and hot water. This solution was one of three homemade options I learned about - the others were vinegar and water and ammonia and water. When I woke up this morning and my entire first floor smelled like fabric softener, I can tell you I was sure I'd made the right choice. I don't want to be thinking of my bathroom as a pickle factory...or worse.


Work it wet. The internet encouraged you to try pulling at a corner and seeing if you might just remove large chunks of the wallpaper while it was dry...my theory now is, if it was installed properly and isn't already peeling itself off, then it won't come off dry.


Work it REALLY wet. After my first run of spraying down the walls I realized that the directions on how to do this should say SATURATE in all caps because truly, it has to be really wet to peel easily. Soak it really well, leave it for a 15 minutes, then come back and soak it some more...keep the surface you are working on wet, and the next surface should be soaking while it waits.


Multiple passes are needed. While you may get the pattern off the wall, you need to remember there is backing and glue also on your wall. The backing and glue will not be a friendly surface for painting, so you have to keep passing at the walls - saturating it continuously - to get to a clean surface.


Finger Nails make great scraping tools. While the paint scrapers I used worked very well, sometimes there is no substitute for a finger nail to get under a stubborn piece of wall paper, scrape some glue off, or get into those tight spaces in corners and edges.


Clean as you go. I did not use a dropcloth. This was not intentional, I thought I had one, but turns out there wasn't one in the house, and I wasn't interested in going out for that. So, I just made sure to clean in stages. As each section of wall was soaking with the removal solution, I would clean up the last section's peel-off and mess. When I got to the backing and glue stage, I used paper towel to clean the scraper edge and also kept a wastebasket on top of the toilet for easy access. The backing and glue is definitely the messiest as it becomes a pastey substance that gops up and sticks to everything.


This project was both easier, and harder, than I thought it would be. Easier in that by taking my time and ignoring my desire to jump ahead and quelling my tendency to get quickly frustrated and throw in the towel, it actually worked. Harder in that it took most of my weekend to do it and it did require concentration, patience, and stick-to-it-iveness. This journey may be as much about changing myself as it is about changing my house.


All that being said, I can tell you this. It is a good thing this is the only wallpaper in my house, because next time, I'm painting over it.

Saturday, January 9, 2010

Update on Freecycle Plate Racks

We have a winner (or a taker?)....The plate racks offered on January 4th will be finding a new welcoming home in Wurtsboro NY (less than 50 miles from it's current home!). "Lay" has a dining room in a home she and her husband are refurbishing after a fire. From what I can tell, the fire took place before they bought it, and they've taken on the project house. Luckily Lay's husband is a carpenter, and a man with skills is definitely required for such a project.

Lay promises she is working up her own blog, so I'll be sure to link over when she gets started and hope to see a picture of the plate racks in a beautiful new dining room sometime later this year.

Good Luck Lay!

Friday, January 8, 2010

The Half (Bad) Bathroom

In the 1950's a half bath was added to the house. I am thankful for it every time we have guests as I grew up in a one bath home and when you start to add occupants - even temporary ones - the very delicate balance of bathroom timeshare is quickly upset.


However, this bathroom needs a lot of help.


When we first moved in I determined not to spend any money on this room as I had plans to make it into 3/4 bath (with shower stall) since a full bath seemed infeasible. Since this room is on our first floor - separated from the dining room by a glass paned door - we use the adjacent room (supposedly a 3rd bedroom) for an office.


This room also has the largest closet in the house - a source of total amusement to us both. This double-door closet even has a cedar lining, totally wasted on the paper, cameras, musical instruments, computer ware, games, wrapping paper, etc. that fill it.


I had hoped that with a little reconfiguring of the floor plan I might keep a mid-sized closet and gain a shower stall and still have a room that could measure out as a small guest room or a home office in the appraiser's eye, so stay tuned for some drawings. But in the meantime, and since a construction budget with plumbing is not in my plans for this year, it's time to think up a facelift.


Half Bath Project #1: Wallpaper...my god the Wallpaper


I'm going to research the best way to rid my walls of this pattern immediately. From watching HGTV (and have I mentioned how pissed I am at cablevision that HGTV is not on anymore?...giving them to the end of the month and then FIOS it is!), I know I need to score the paper and use a solution (I think it is half water half soap - but I'm checking) and then scrape, scrape, scrape. I think it may be kind of cathartic.

After that...we'll move on to shopping for a new pedestal sink...stay tuned.

Wednesday, January 6, 2010

Past Project: a New Roof, Windows, Gutters

Ok, so this may be cheating a little. (A) this was completed in 2003 and (B) I did little except get out the checkbook. But technically, it is about the Yellow Cottage and also, there are some lessons learned.

The first lesson is finding a good contractor. We really didn't know anyone in the area to get recommendations from, so we decided rather than eeny-meeny-minie-moing it through the yellow pages, we would at least seek out an opportunity to meet contractors in one location. So, we headed over to the local home and garden show at a nearby college. These kinds of events are jackpots for research and also for the all important chemistry you want with your contractor. Watch out for sales people who are never seen again after the contract is signed and look for self-made contractors with references.

We talked to several contractors that day and found one we liked the most. He also did windows and siding (many roofers do) and we felt we had a good connection.

The second lesson is to always get multiple quotes. We took cards from several contractors. My number one rule was, if they don't show up, there are no 2nd chances. I was not going to worry about chasing down some contractor after they had ripped half my roof off. If he couldn't even show up to make the sale, how reliable would he be once the job started. We managed to get a few bids and, as luck would have it, our favorite from the home show was very competitive.

Lesson number three came when the contractor realized that while he had assumed there were only two roofing layers (you can go up to three layers in our county before doing a tear-off), he had been looking only at the newer extension roofs on the house. The main section of the house had three, so a tear-off was necessary. His quote only went up a little though - as he shared his mistake cost with us.


Always make sure the crew protects your windows and garden plants (and in our case an inground pool!) with plywood and/or tarps. Also, make sure that the contractor understands how to roof around chimneys (if you have one) and that if there are any additional structures or features on your roof that you discuss them in advance. We had an old tv antenna removed. Of course the contractor should have adequate tarping in case rain interrupts the job before the new roof is in place!


Because we were also having the contractor do new windows and gutter/white work, we also had the metal awning over the house removed.

After only a few days we had a new roof, new windows, new gutters - and we loved it. We had selected a standard shingle that had the new "architectural" look. Architectural shingle are beautiful, but costly, and also have a texture or ridging to them that requires a little more upkeep. With variations in color, the standard shingles were able to fit the bill without increasing the bill. The windows were all 6 over 1 (6 pane over a single open bottom), and while we had loved the beauty of the original windows - many sashes were broken, some glass was cracked, and both the noise and the insulation needed updated double-paned windows.


While the crew was very clean and took care to clean up, we had to be very cautious with bare feet in the garden and pool area for a while until we cleaned up stray roofing nails. Not something you want embedded in your foot!


Last lesson is PAY ATTENTION to weather changes. When we had some torrential rains after the work was done, we ended up with water damage in our front hall ceiling. The pitch on the gutters had been changed and was pitching back toward house in one corner...the build-up of water was such that it backed up under the roof and into the front hall ceiling. Tracking down a contractor after the final bill is paid for something like this is not always easy, but we were pleased that ours sent out his site manager within a few days and it was fixed within a week.

Research time: about 2 months

Contractor Quote/Cost: $8,000 (went to $8,500 with tear-off)

Schedule: completed in less than 1 week

Tuesday, January 5, 2010

So...how many socket sets do YOU have?

I did it! I uncovered the workbench, sorted the tools and discovered many, many supplies for my future projects. Voila - the revived and refreshed workbench area. [Before shots here]


Granted - it is still an ugly basement - but just behold that organization! Want a closer look? You know you do!! The tools still on the bench are sets I want Kip (aka Hubby) to review to be sure they are pretty much complete. Once he has done that, they'll get tucked into those shelves or the EMPTY toolboxes along the wall and there will actually be a small space to...you know...work on the bench!


Here is pegboard #1. I didn't get far enough to actually outline the items as I had planned, but I wasn't sure they were organized in exactly the right place just yet...so I'll wait to see how this works out.


And here is pegboard #2....looking mighty fine as well.


And here is the "paint shelf". I gathered up umpteen gazillion old paint buckets and moved them to the garage. Now that constitutes an incomplete project as far as I am concerned, but I did research the town household hazardous waste (HHW) facility, location, and open hours and will be taking as many as I can at a time until they are all safely and properly disposed of. The paint that remains is the most recent and will hopefully provide us with some spot cover supplies as needed. I'm considering purchasing some clear plastic paint containers that will help us see what is what and keep the paint in good condition for retouching. I also kept some base coat (whites) in varying finishes - satin, semi-gloss, flat for those overall projects.


Oh - and the answer to my question: "How many socket sets do YOU have?" We have three and a half. So I'll have to look for some projects for socketing [?] in the near future.


So project #1 - 80% complete (the remaining 20% relates to disposal and also the lighting fix)

Time: Approx 9 hours
Money: $0!!
Result: 4 large bags o' trash, several boxes of HHW and recycling, and several entries into the FREEcycle pile.

Monday, January 4, 2010

Save a Landfill - FREEcycle with me!

What do I mean by Save a Landfill?

I mean - help me out by taking home one of my beloved items. Every week or so, I will post all those treasures still worthy of gracing someone's home, but that doesn't fit or suit my own anymore. I'm not much on hosting a garage sale, but I'm very interested in finding people who may find treasure in my trash. [see label: FREEcycle]

And I promise, it really isn't trash. Anything truly trash-worthy is in a Hefty bag right now.

Several of these items never made it out of the box and they are truly NEW! I'm willing to donate up to $5 for UPS Ground postage for anyone who is interested in an item. For right now, it will be first come, first serve....if we start getting lots of interest on later items, I'll start randomly selecting. I promise no bidding wars (unless shipping gets really pricey!) So, take a look at my FREEcyle pile and help me Save a Landfill!


Item #1: Plate Racks (2)
(plates not included)


I have two identical plate racks that have not been used since leaving our townhouse 7 years ago. These are sturdy and made of black coated metal and in perfect condition. I have the mounting screws as well. The plates show in the picture above (not included) are between a saucer size and a lunch plate (diameter: 6") The plate rack itself measures 18" at its widest point by 27" at its highest point. It can fit full size dinner plates if desired.

Interested? First comment gets it!

P.S. No takers by end of month and I donate or try other options.

Sunday, January 3, 2010

Abandon Shame (Not Hope)

One thing I determined before beginning this project blog was that I would have to abandon shame. What is, is. The mess, the disorganization, the stuff that is normally hidden from view is now front and center. Most of my family believes me to be a neat person. The rooms in which we live may need some face lifting, and may need some selectivity in the tchotchkes, but all in all those living spaces are neat and organized. The hidden spaces? not so much.

I blame some of it on the old house appointments - small closets, odd angles, dusty, grimey, and a little the worse for wear. But that's just an excuse, the primary problem is laziness. A tool picked up is put down where we finish using it. An unseen corner of the basement that is the "workbench" is dark and around a corner we rarely turn so who's to pay attention to the mess.

So, here I go....transparent as I can be. Introducing you to the shame that is our "workbench" area in our dingy dark old basement.


This is the view into the work area. It is a small little alley space cut in behind the sub-level garage we have. Lighting is a challenge...right now a very ancient two prong extension cord runs through a hole in the ceiling to a plug in the garage.


An old lamp missing its shade that came with the previous owners (and maybe the original owner) stands in the back corner - as ugly as it is old...all of the cords are connected to a 6 outlet device that seems similarly ancient....not even Penny Cat can believe we use this lamp.


Currently to turn on the lighting I have to open the door into the garage and click on the light switch to power up the outlet. Needless to say, part of the project is safe and reliable lighting!


Turn your back on the bench and peek backwards into the other part of the utility/basement area where we have put up shelves, but somehow stuff keeps piling up in front of them rather than on them. In this view alone there is our outdoor hammock, a beer brewing container, spare and broken chairs, and ash vacuum for the firepit (which belongs to my in-laws), summer fans, bags of clothes for charity, etc, etc, etc....

This is the surface of the workbench, which should be...well...a surface! Note the peg board on the left...nearly empty...not to mention the bent long screwdriver in back that Hubby bent driving to put holes in frozen ground last year for the driveway reflectors to avoid plow damage to the lawn.


A view of the floor - oy! old paint, empty bottles, tools, dust, mess, etc.....


Anybody have some empty jars that fit these lids? If so I can take advantage of previous owner's attempt to organize nails and screws and keep them off the bench.


Another pegboard with more empty hangers than tools. Imagine this board in a few hours (or days) with outlines of our tools in place so when a tool is missing, we'll always know which one.

So...I begin. The after pictures will come shortly....and I'll account for any money I may spend on storage solutions, although my goal here is to use what we already have...just smartly.

Saturday, January 2, 2010

Cottage History

Our yellow cottage wasn't always yellow, and of course, wasn't always ours. We are only the 4th owner of this unique property, built in the 1930's. The original owner built this house when it was nearly the only structure for several miles, and all the property was owned by one family.

Over time, two additions were made to the original structure, like wings on an angel, they added a small narrow sun room (we call it the studio due to my husband's claim of the space for his own artist's den), and the larger addition of a 2nd garage, extended kitchen, 3rd bedroom, 1/2 bath and cedar closet. And with all of those additions, nearly doubling the first floor square footage, the house is no bigger than the average townhouse - about 1,600 square feet. Because the additions were likely done in the 50's, they also have a dated feel to them, not the modern open floor plan so popular today.


In 2002, the house was more like a peachy-tan stucco finish, with broken green shutters and crooked window boxes, an aluminum awning over the front door and many overgrown bushes. It also resides on a well-trafficked street making open windows in the summer a little less pleasant during the bus schedules.

But...with all its warts and shortcomings...we love it.

We actually bought the home from friends who were transferred out of the area. We had spent many a happy hour drinking wine by the stone fireplace, hanging by the pool, or cooking together in the kitchen. It is, as our friends said, a house of good karma. After touring the house with our friends (both engineers) who did their damnedest to take disclosure to a new level - even at times discouraging us from buying, we made a deal with a handshake and the house was soon ours.


As most home buyers do, we entered the house with energy - and though we loved it - we also knew it was a fixer-upper in some sense and were determined to make all those personal preference changes immediately. The first 6-12 months were a blur of projects. It was a combination of high cost and low-cost improvements. On the night we closed on the house in December of 2002, we braved blizzard-like conditions to use our key for the first time and with the light from a single overhead bulb, we ripped up old carpet in the downstairs bedroom and the master. In typical fashion - that rush was the precursor of many half-done projects. It gave us quick satisfaction, but we have yet to either re-finish those floors or re-carpet them. [A project I'd like to accomplish this year!]
After moving in and unpacking, we began painting rooms, adding crown moulding, arranging and re-arranging our furniture. We were stunned to realize that despite the fact that we had moved from a mid-sized townhouse, we couldn't fit all our living room furniture in the cottage. We tried everything, but eventually gifted one nearly new couch to friends to get it out of what was supposed to be our dining room.
The high-cost projects included one urgent roof tear-off and replacement, and then some aesthetic changes including a new patio, new windows, gutters, and siding (where we finally got the yellow color). After a couple of years and some concern about an increasing tilt to a retaining wall in back, we had a landscape company build a new retaining wall with a patio-block - which cost nearly as much as all the other projects combined. We also removed some old sickly trees [after some touchy negotiations with neighbors], added some built-in architectural features, and installed some new flooring in the kitchen.

I can quite determinedly say, we have certainly done our share, which I intend to tell the tales of to take full credit. I'm writing those up next, so look for items under "past project" links to see the full story of our experiences with the Yellow Cottage.

Friday, January 1, 2010

Welcome to the Yellow Cottage

My home improvements can be characterized by two words - impulse or immobility. This blog? yes, it would be in the impulse world, but I'm a little tired of immobility. My hope is to find a path down the middle that allows me to arrest some of my HGTV envy and to increase the value of my home through thoughtful, creative, improvements.

Here's the simple, yet daunting plan.
  1. For one year, spend time every week in tackling home improvement projects. Some weeks may be research, some may be sketching and planning, some may be shopping, some may be all about the elbow grease.
  2. Record the entire experience right here -- the ups, the downs, the plans, the lessons learned, the fixes and foibles, the impulse and immobility.
  3. Try not to lose my sanity or my marriage in the process.

The most difficult thing, thus far, is determining where to start. This morning as I lay in bed (how many Saturdays in my future will THAT be happening?) I mentally inventoried the house and its inexhaustible list of projects. Should I begin with a big bang project to really get things rolling? Or should I start small to build confidence? Maybe I should use some video clips to better show before and after and full 360-degree views?

There are quite literally thousands of opportunities for projects in our tiny yellow cottage. Our bedroom is the ultimate project space - we've done NOTHING with it since moving in 7 years ago. But it boggles my mind and I know the very first step is finding and buying bedding that I love so I can change the paint color that I hate and perhaps move beyond the plastic mini-blind window coverings that haunt my dreams! But then again, maybe...just maybe...I should start with the "workshop" in the basement so I can actually find important things like a screwdriver?

Perhaps, I should even begin with some before-after stories to show that in the first year we lived here, we actually did quite a bit of home improvement (get some credit for effot to date!), but then we got a little lazy, a little complacent, and maybe a little broke.

For now, I'm still all in my head...wrestling with that immobility factor...and this weekend should be all about getting ready for the holidays, gearing up for another long 50+ hour work week, and reading/assignments for my next semester of school as a grad student.

[sigh]

So...welcome to the Yellow Cottage...we'll be installing color coordinated padding on the walls soon. Stay tuned.

Related Posts with Thumbnails

Your Host

Blog Archive


Copyright 2008 All Rights Reserved | Revolution church Blogger Template by techknowl | Original Wordpress theme by Brian Gardner